Managing screenshots efficiently on your Mac can significantly enhance your productivity and communication abilities. Whether you’re capturing, cropping, or pasting screenshots into documents, mastering these skills is essential. In this comprehensive guide, we’ll walk you through detailed steps on how to paste screenshots into documents on your Mac, along with tips on editing, managing, and converting them.
Taking Screenshots on a Mac
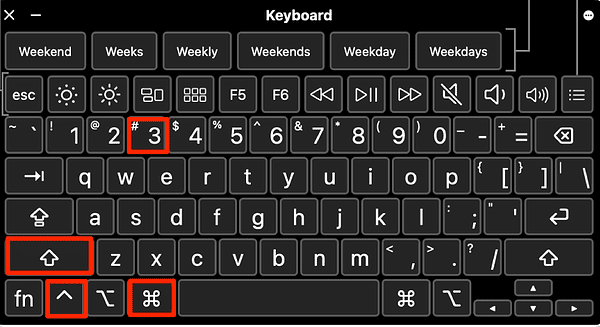
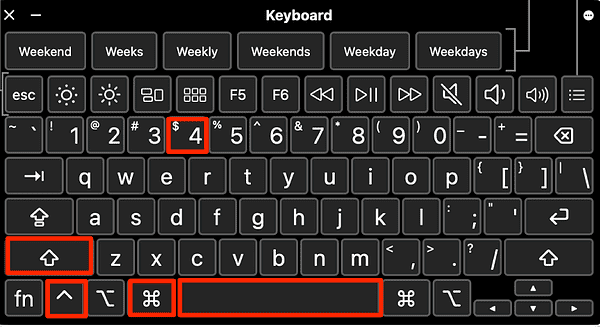
Taking screenshots on a Mac (MacBook Air, Pro, and Mini) is simple and versatile. You can capture the entire screen by using the MacBook screenshot shortcut: Shift + Command + 3 together on your Mac keyboard. For a specific entire window or menu, use Shift + Command + 4 + Space bar. To capture a portion of the screen, press Shift + Command + 4 and select the desired area with your mouse button.
1. Types of Screenshots
On a Mac, taking screenshots is simple and flexible, with multiple approaches to accommodate various requirements.

- Full Screen: Press
Command (⌘) + Shift + 3to capture the entire screen at once. This is ideal for capturing everything visible on your display.

- Selected Portion: Use
Command (⌘) + Shift + 4to capture a specific portion of your screen. After pressing these keys, your cursor will turn into a crosshair. Click and drag to select the area you want to capture. - Window or Menu: For capturing a specific window or menu, press
Command (⌘) + Shift + 4, then press theSpacebar. Your cursor will change to a camera icon, allowing you to click on the window or menu you want to capture.
2. How to Crop Screenshots
After capturing a screenshot, you may want to crop it to focus on the essential parts. Follow these steps using the built-in Preview app:
- Open in Preview: Locate the screenshot file on your desktop or in Finder, then double-click to open it in Preview.
- Select the area: Click on the “Tools” menu and choose “Rectangular Selection” or press
Command (⌘) + K. Drag the cursor to select the area you want to keep. - Crop the Image: With the selected area highlighted, click on “Tools” again and select “Crop” or press
Command (⌘) + K. This action removes the surrounding area, leaving only the selected portion.
3. Methods for Pasting Screenshots
Once you have your screenshot ready, you can easily insert it into documents like Microsoft Word, Pages, or other text editors.

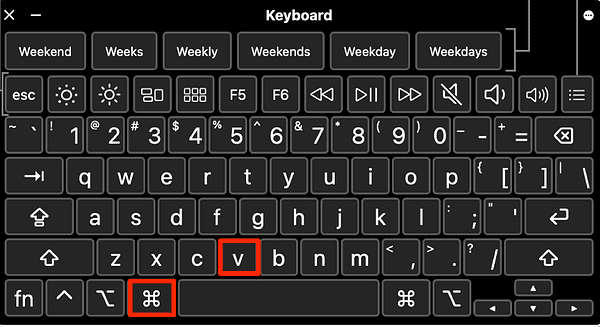
- Using Clipboard: After capturing or cropping a screenshot, it is automatically copied to your clipboard. To paste it into a document, position your cursor where you want the screenshot to appear and press
Command (⌘) + V. - Drag and Drop: Alternatively, you can locate the screenshot file on your desktop or in Finder. Click and hold on the file, then drag it into your document. Release the mouse button to drop the screenshot into place.
4. Accessing and Deleting Screenshots
Managing your screenshots includes accessing them for use and deleting them when no longer needed.
Accessing Screenshots: By default, screenshots are saved to your desktop. You can also find them in the “Screenshots” folder within your Pictures directory.
Deleting Screenshots: To remove a screenshot, select it on your desktop or in Finder, then press Command (⌘) + Delete or drag it to the trash.
5. How to Convert Screenshots
Depending on your needs, you may want to convert screenshots to different file formats:
Exporting as a PDF: Open the screenshot in Preview, go toFile > Export as PDF, and choose your desired format (e.g., JPEG, PNG).
Other Formats: You can also export screenshots in formats suitable for web use, such as JPEG or PNG, by selecting the appropriate option under the “File” menu in Preview.
6. Taking Screenshots of Scrolling Text
For capturing longer pages or documents that require scrolling, consider these methods:
Third-Party Apps: Use specialized apps like Snagit or extensions available in some web browsers that allow you to capture scrolling screenshots.
Built-in Tools: Some applications, like certain web browsers or document viewers, offer built-in options for capturing scrolling screenshots. Explore their menus or preferences to find these features.
Frequently Asked Questions (FAQs)
Q1: How do I paste a screenshot directly into an email on a Mac?
After capturing your screenshot, open your email client, place the cursor where you want the screenshot, and press Command (⌘) + V to paste it directly from the clipboard.
Q2: Can I edit screenshots directly on a Mac without third-party software?
Yes, you can use the built-in Preview app to crop, annotate, and make basic edits to your screenshots.
Q3: How do I take a scrolling screenshot on a Mac?
Use third-party apps like Snagit to capture scrolling screenshots, as macOS does not have a built-in feature for this.
Q4: Where are screenshots saved on Mac by default?
By default, screenshots are saved to your desktop. You can change this location through terminal commands if needed.
Q5: How do I convert a screenshot to PDF on Mac?
Open the screenshot in Preview, go to File > Export as PDF, and save it in your desired location.
Q6: How can I delete multiple screenshots at once on Mac?
Select multiple screenshots by clicking while holding the Command (⌘) key, then press Command (⌘) + Delete to move them to the trash.
For more tips and insights into optimizing your Mac experience, explore our blog regularly. We’re committed to helping you unlock the full potential of your Mac and stay updated with the latest tools and techniques.
Discover more about screenshots and other Mac-related topics on our blog, and elevate your digital proficiency today!


